If there is something that I love, it’s the fact that I can do numerous things with the same app. That’s why AirBrush is my favorite when it comes to editing pictures. They provide you with several free features! Don’t believe me? Let me show you 10 AirBrush tips & tricks that will make your pictures end up amazing!
1000 filters in 1
Besides the many filters that you can find in AirBrush, you can use this trick as well!
-Choose a filter.
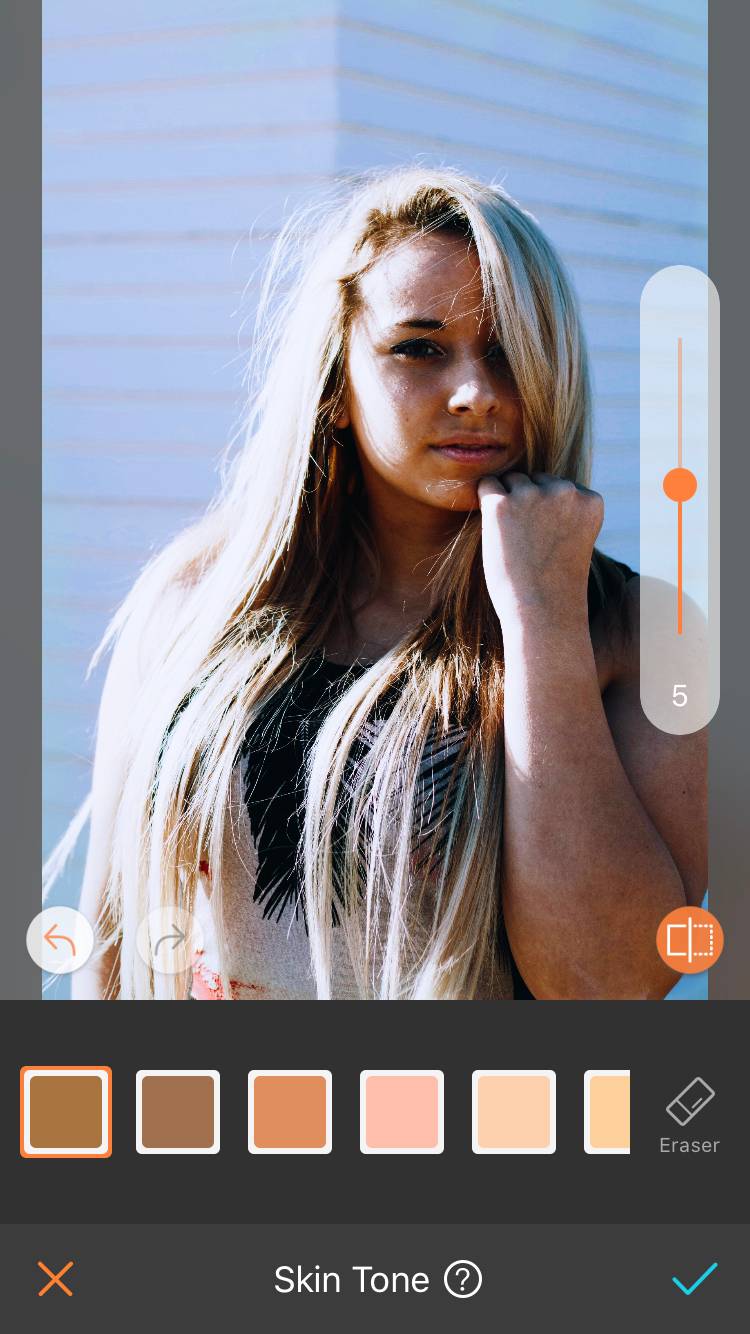
-Head to Skin Tone and “brush” the whole picture.
Each Skin Tone will make the picture have a different shade! So, aside from the basic filter, remember you can also personalize it!


In this picture, I used the Iceland filter and added different skin tones to notice the difference.
Let’s put a smile on that face!
Has it ever happened to you that sometimes when you are trying to take a picture, you can’t find the right smile? An easy way to fix this would be using the Reshape tool! Choose the “Light” option and start pulling a smile up until you are satisfied!


Not so serious anymore!
Remove the yellowish shade
This trick is a bit old but is very simple and reliable. To remove that yellowish shade that covers our pics on closed environments, we just have to adjust the temperature!


Removing background details
You’ve seen our previous posts on how the AirBrush Eraser works, and most of the time, we use it to remove “intruders” from our pictures. This time we’ll show you how amazing it is at eliminating details from a background too.


Darkening a Background
We can use Skin Tone for this trick, as well. We select a picture in which the light is coming from the back of the camera towards yourself. This way, the background is already dark.


In order to make the background darker, we brush the negative space with the darkest Skin tone. That’s it!
Getting the best out of Bokeh
Sometimes, when we opt for the Smart selection option from Bokeh, the outcome might not be perfect (everybody makes mistakes). So we can take these steps to fix that:
-We first add Bokeh to the selected picture. If it does not apply correctly, we then proceed to step number two.
-The trick is in turning the picture around and applying Bokeh once again!


Stretching in order to Crop
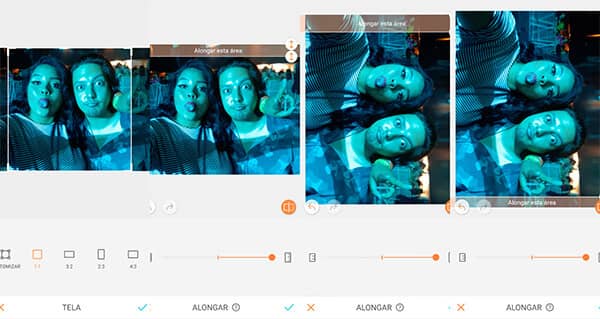
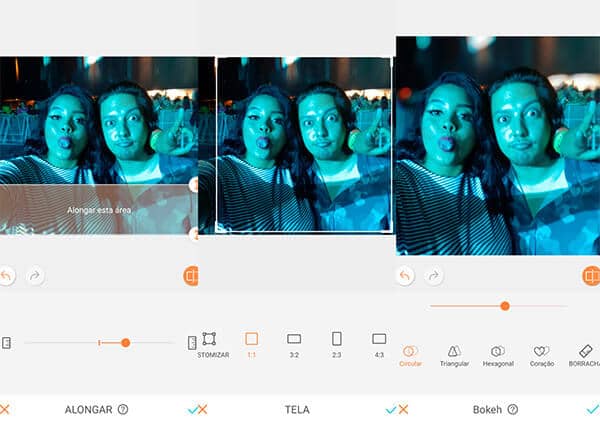
It is very annoying when you have a great selfie, and the only touch it needs is a little Crop, but you can’t Crop because it will take a good chunk of the pic! So, in order to fix that, we can use the Stretch tool. We stretch the extra areas, and when you are done, you can crop from there!


Eye color change
Here we go with the Skin Tone tool again! Changing the color of your eyes is super easy, and yes, you guessed it right. You just need to apply the Skin Tone on your iris for it to change the shade.


Freckles
Who doesn’t love freckles? It is the cutest facial feature! And we are not sure if you know, but AirBrush has its own Freckle Makeup! A little advice after using this makeup would be to use the Relight tool to make those Freckles pop!
Pro tip: If you wish to only activate the freckles and not the rest of the makeup, you can always tap on the little white hand on the bottom left corner and deactivate the rest of the makeup.


Glitter tricks
Glitter is one of our favorite tools, and the best part is that you can actually use it on everything!
You can use it on your clothes:


Everything is a matter of creativity! There are numerous things that you can achieve with AirBrush. If you have any hacks or tricks that we did not mention, you can always share it with us on Instagram @airbrushofficial.
We hope you enjoyed it and are going to take advantage of them. Let’s get inspired and start editing amazing pics with AirBrush!


