In today’s tutorial we are going to learn how to use the Highlighter feature of the AirBrush app. This option allows you to increase the lighting of specific areas in your photo. For example, you can apply it on your face to give your skin a refreshed and glowing look. Using the Highlighter mode on your picture will also create depth and accentuate your features.
The Highlighter tool of the AirBrush app is as handy and easy to use as it comes with an adjustable brush size and eraser option. However, these options are only available to our users with an AirBrush subscription.
How to use “Highlighter”
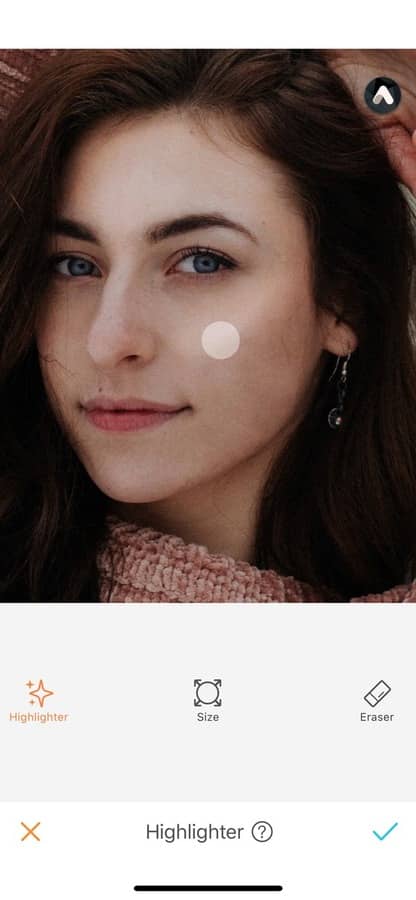
Once you’ve uploaded your picture into the application, open the Highlighter option. This one is represented by the diamond sparkles.
Adjusting the brush size
The first step in editing your picture is to adjust the brush size. To do this, select the size icon and drag the dot either right or left. You can increase or decrease the size of your brush from 0 to 100. The size option is available throughout your edit, don’t hesitate to change the size to suit your editing needs.

Highlighter
Once you’ve adjusted the brush size, select the highlighter icon. To apply the effect, run your finger on the areas of the photo you want to brighten. For more accuracy, zoom in as much as needed.


Eraser
If you’ve pushed the editing a bit too far, don’t worry. The eraser option allows you to remove the effect. For this, select the eraser icon. Once selected, the affected areas will turn blue. You can now remove the effect by running your finger on the blue areas.


If you haven’t tried the Highlighter effect yet, what are you waiting for? Head to AirBrush app, upload your picture and get that glowing look! Show us the results on Instagram with #AirBrushApp. We can’t wait to see your pictures!


