This time of year, everyone’s in the frame of mind to review the year that came before and what we’d like to accomplish for the new one. As an entrepreneur, you may totally be into all the inspiration and strategies being shared as you also determine how you plan to move forward for the first quarter. AirBrush has been cooking up something that is going to help you when creating engaging video content. You can now do simple video edits directly in the AirBrush app. We’re going to walk you through where you can find the features, and what they’ll do for your videos before you get to posting.
[my-wp-abtesting id=”151813″]
Let’s get going!
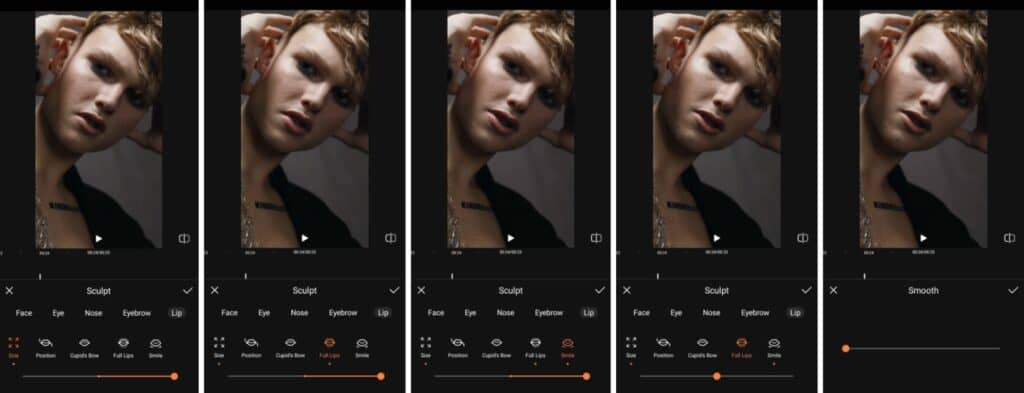
The new video editing feature, now housed directly in AirBrush, is made to add that bit of Retouch magic to your entire video timeline. This makes the bridge from idea to shooting to posting that much easier because the obstacle of not being “camera-ready” is eliminated. With the new video editing feature, Retouch tools like Smooth, Whiten or Matte are a finger tap away and they’ll make sure you look polished and/or professional and ready for your online platforms. Let’s take you on a walk-through of our latest feature.
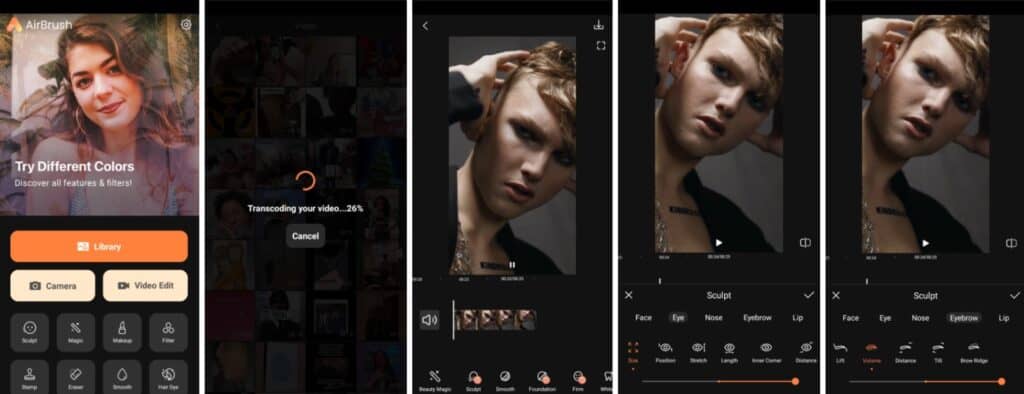
- Find the Video Edit button on the AirBrush Home Screen
- Tap the Video Edit button and select the video you want to edit
- Your video will be transcoded if necessary and make take a few minutes
- Once your video is loaded, choose between the retouch options to edit the video
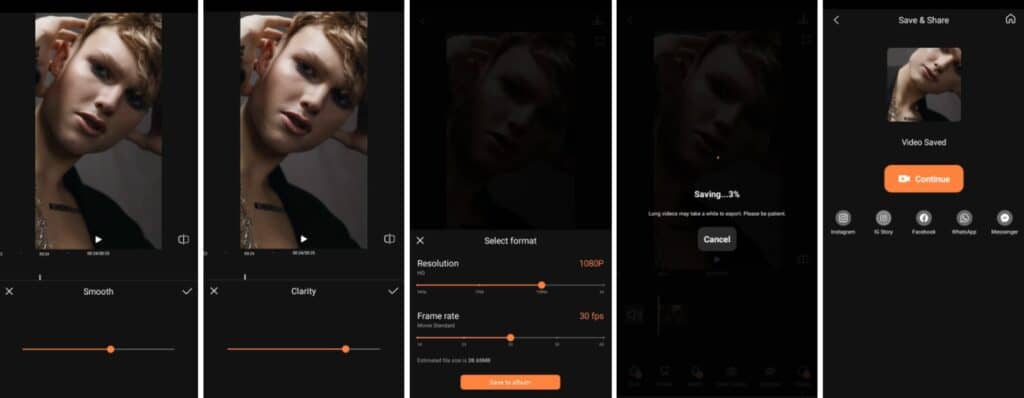
- Once your edits are made, tap the save button in the upper right corner
- Choose the save file format and hit the Continue button
- Your video will then save which may take a few minutes
Let’s Level Up for 2023!
Now that you’ve seen how easy it is to use our latest AirBrush tool, let’s give you a refresher on how you can create engaging video content.
Collate your Content


The first step to creating your engaging video content is making a selection of your latest and most relevant photos and video clips. You can also include clips that relate in any way to your brand and its product and services.
When you have your selection made, you can make your restaurant’s offerings even more eye-catching with a Filters edit. Choose from our selection of Filters to boost colors or establish a specific color theme. Here’s how you do it:
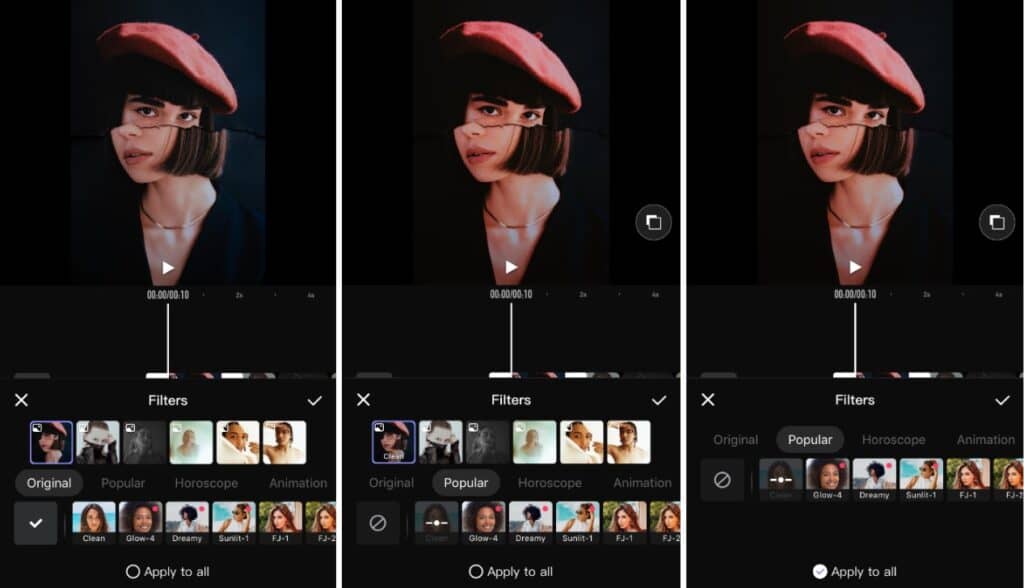
- Go to the Filter tab on the main menu.
- Go to the tab on the main menu
- Choose the most suitable option to apply
- Toggle the intensity with the slide bar
- Tap the checkmark to save your edit
Trim the fat
Once you’ve got your enhanced photos, it’s time to turn them into a promo video. But keep in mind to keep it concise or you’ll lose your audience’s attention. You can track the total time of each clip and the entire video itself to better conform to platform-specific standards. There is also Toning that offers traditional editing options like Saturation, Contrast, Brightness, etc.
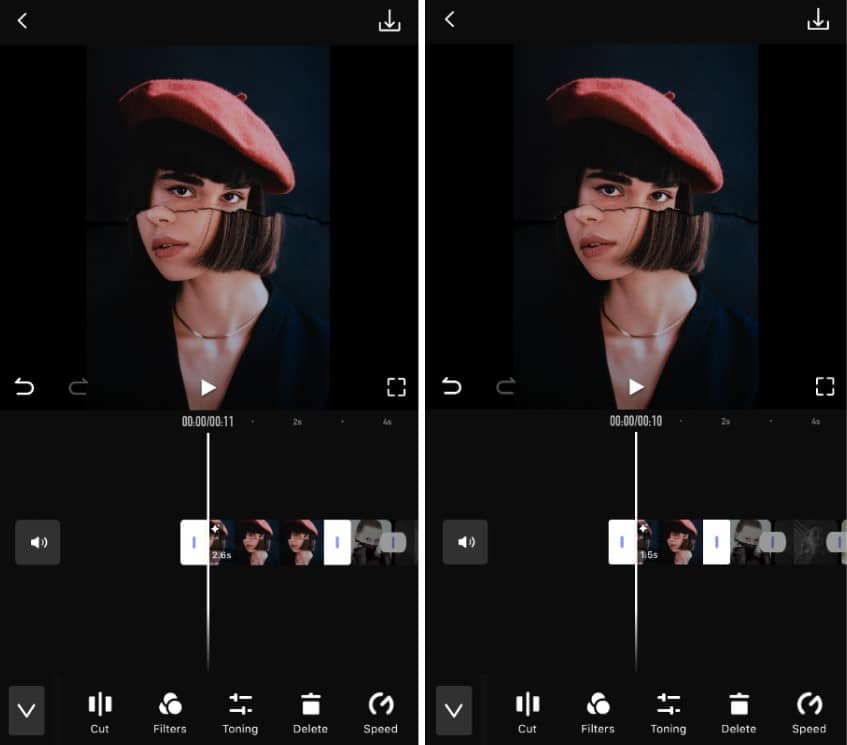
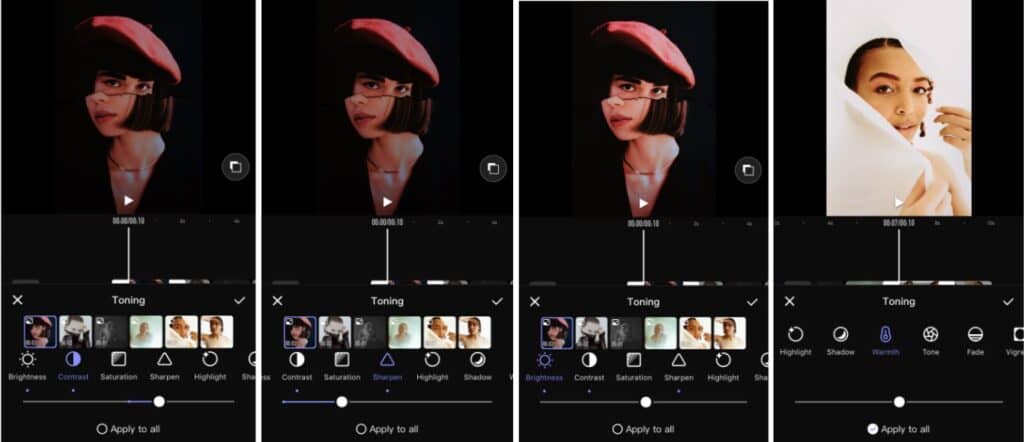
- Tap the video timeline once you’ve selected which clips and photos you want to work with.
- Use the white anchors that appear to drag the clip longer or shorter
- Tap the check mark to save your changes
Note: you can track the total time of each clip and the entire video itself to better conform to platform-specific standards.
Effects
Effects work great as part of creating engaging video content as intros and outros for your promotional video. With six categories to work with, we think you’ll be able to find one that reflects your brand’s vibe.
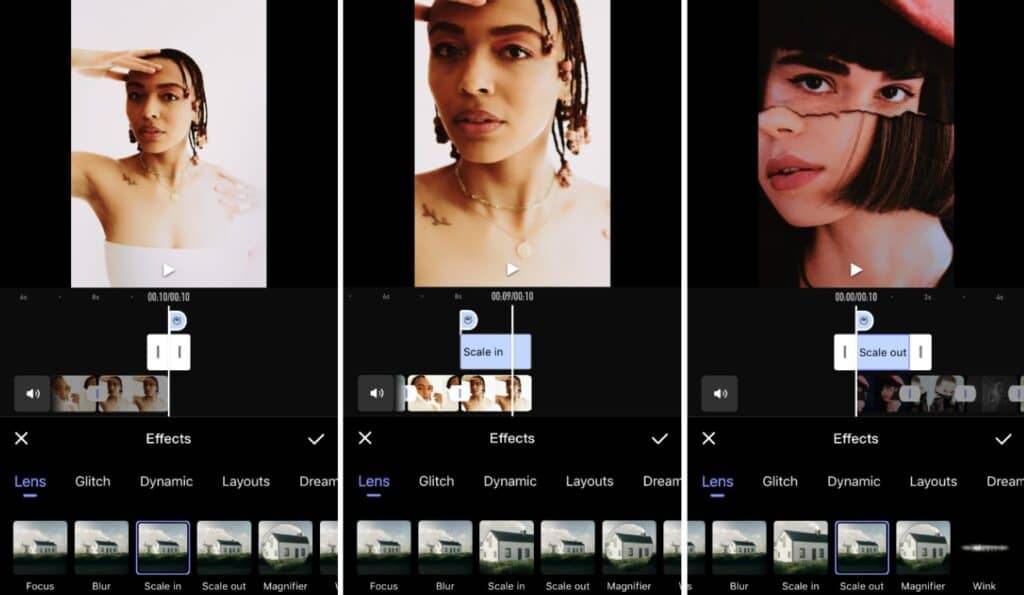
- Tap the Effects tab on the main menu
- Choose the category of Effect you want to make. Lens and Glitch are always popular choices
- Once applied, you can adjust the length of the effect by sliding the white anchors
- Tap the checkmark to select
Text
The advent of video content has grown and there’s no going back. Since you’ll want to keep the video short, as we’ve discussed, Text is made to convey information quickly. Flash the name of a website, your other SNS channels, products or whatever you wish to promote.
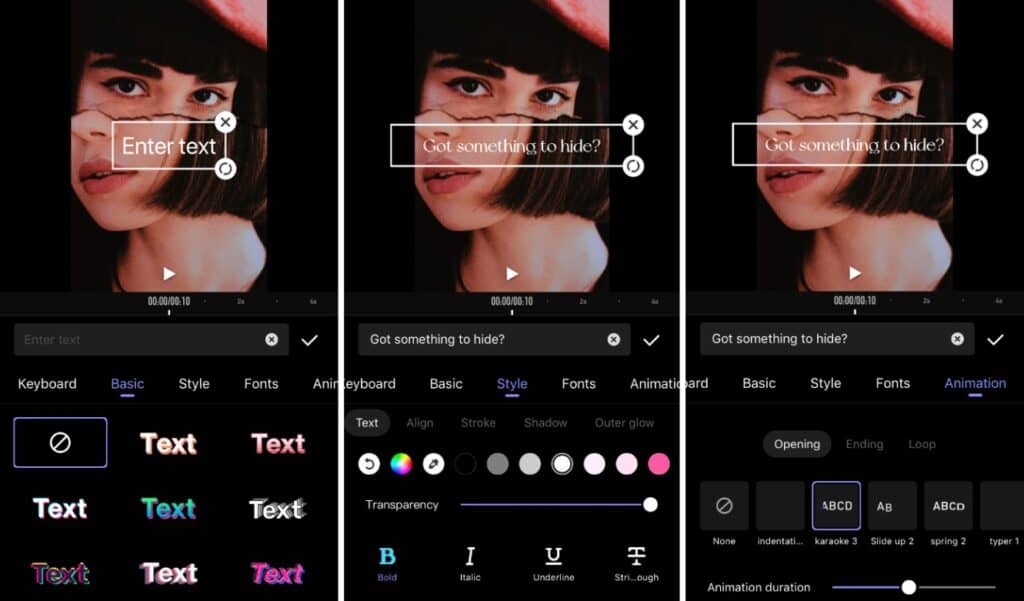
- Tap the Text or Subtitles tab on the main menu
- Choose a Basic text style for a stand-out font.
- Refine the Style by selecting elements such as color, transparency, alignment, background and many more
- Though optional, you can then apply your selections to a new Font – with 30+ to choose from.
- Finally, you can add Animation to your Pride Month video for greater visibility.
- Tap the checkmark to select
Lastly, save your videos to the camera roll or share them directly to Instagram, Facebook and other popular platforms!
- Tap the save icon at the top right corner of the screen once your edit has been finalised.
- Choose your resolution, and frame rate, and then select “Save to Album”
- Wait for the video to render and you’re all done select
And there we have the start of the new tools that AirBrush will be introducing to make video editing and the creation of engaging video content easier than ever. Your face-to-camera videos are now able to get a facelift that can be as subtle or as intense as you desire. Establish your branding elements that will appear in the video and then use AirBrush, the easy photo editor for the flourish. Once you’re ready to post, be sure to tag us #AirBrushApp and then follow us @AirBrushOfficial for the latest tips, tricks and hacks for the new year.


