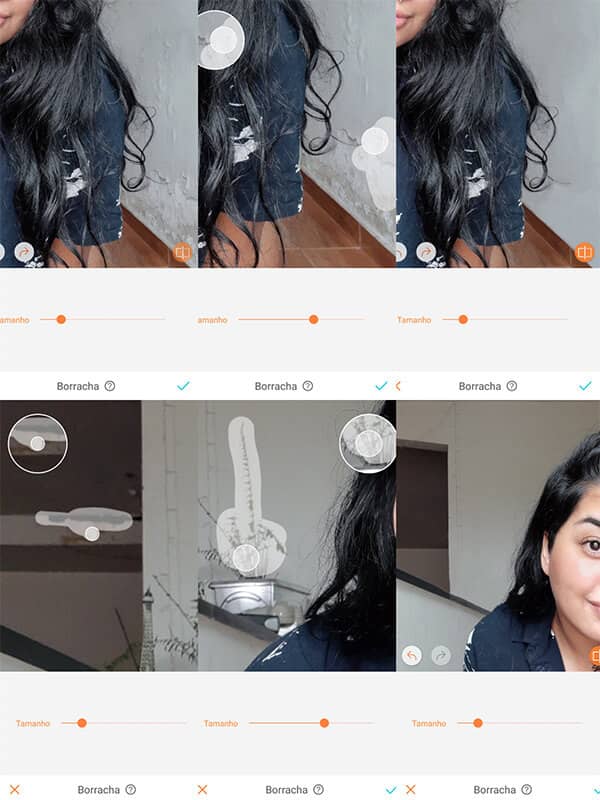
Helloooo!! This is Thay and I’m here to show you how to use the INCREDIBLE new AirBrush’s tool: Eraser. Stay with me…
Blurring your photo to “disappear” the annoying background is soooo 2018. AirBrush’s Eraser tool is what’s new! It helps you get rid of everything you don’t want in your picture. You can choose the size of the tool to erase small or big items. Today I’m gonna show you a little of what you can do with it.
How to use it?
I’m gonna use a very basic photo, I just wanted to remove some objects to leave the background a little bit cleaner.
I opened the photo on my AirBrush app, in the “Tool” section, you’ll find the “Eraser”. It’s super easy to use, just adapt the size of the eraser and pass your finger through whatever object you’d like to disappear.

Tip
Use the big size on big surfaces and make the eraser smaller for detailing. This way you’ll avoid leaving traces of the unwanted objects.
This feature is really awesome! As soon as you get how to use it, I guarantee you, all your photos are gonna be liiiit. Just pass your finger through the things you don’t want and voilá!! After that, you’ll just have to edit your photo the way you like it. This time I used the “Enhance” features and the “Mint” filter.
Before and After
And this is the final result:
A smooth wall without any random objects driving the attention to themselves. I couldn’t be more pleased! But if you want to see how much you can do with this tool, see this other versión without wall.
I hope you like my tips but most importantly, that you use them!
Don’t forget to tag @airbrushofficial once you post it on Instagram!
Kisses, until the next one my dears!


