Flat lays have been on the photography scene for a while now, and we’re pretty confident this trend isn’t going anywhere anytime soon. And why would it? With our eyes being naturally drawn to these artfully arranged images that are able to tell so much in just one frame, these photos are almost guaranteed to generate likes. That’s why we’re here to help you create your own flawless flat lay using AirBrush, the easy photo editor.
What is a Flat Lay Photo?
The name (almost) says it all. A flat lay is an overhead photo taken of items strategically laid out in an aesthetically pleasing manner. The ultimate goal of a good flat lay is to tell a story through inanimate objects. As such, the things in the photo are usually related to a specific theme. Trending themes include travel, photography, style, reading, and remote work.
Start with a Theme

A flat lay is all about the art of subtle storytelling. Therefore, begin by asking yourself: “What story do I want to tell?” Are you a wanderluster with a passion for the open road? A fashion blogger with an eclectic style? A bibliophile with an expansive book collection? Or a content creator working from home? Think about what inspires and excites you most, then commit to using flat lay photography to share it with the world!
Choose your surface
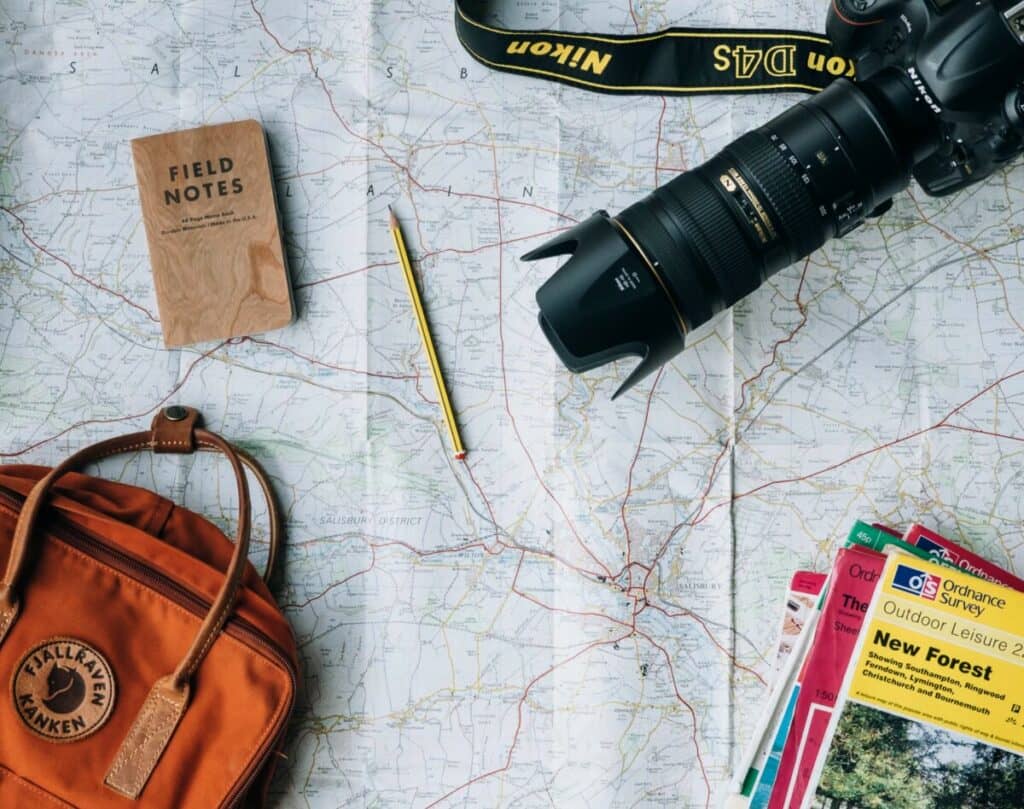
Once you’ve found your theme, it’s time to create! At the base of every flat lay is…the background. Literally. Since the surface you’re shooting on will set the tone of the shoot and determine the mood of the photo, a decision needs to be made. Do you want something smooth and bright; or will a backdrop that’s dark and textured work best?
Lay out your props

The perfect props are at the heart of the ideal flat lay. Naturally, if your theme is something you’re passionate about, props should be easy to find. Select items that support your theme but also complement each other and have fun laying them out. Play around with different patterns to see what works best but be sure to leave enough space between each item so they’re all clearly defined and to avoid your image appearing too cluttered.
Shoot Your Shots

Half of the fun in shooting flat lays is assembling the items. The other half is in capturing the actual shot from above. As always, natural light is essential, so set up your composition close to a window. If you wish, you can introduce a human element like a hand or feet to soften the aesthetic. Then, position yourself so you can comfortably shoot from above. If your flat lay is stationed on a table top, you may need a ladder or sturdy chair so take note of that when planning your shoot.
Edit with AirBrush
Of course, the final step in any photography mission is to refine your photos with AirBrush, the easy photo editor. After all, as great as your flat lay might be, a few simple edits can elevate it to a whole new level of likes, saves, and shares!
Fine-Tune the Details with Enhance
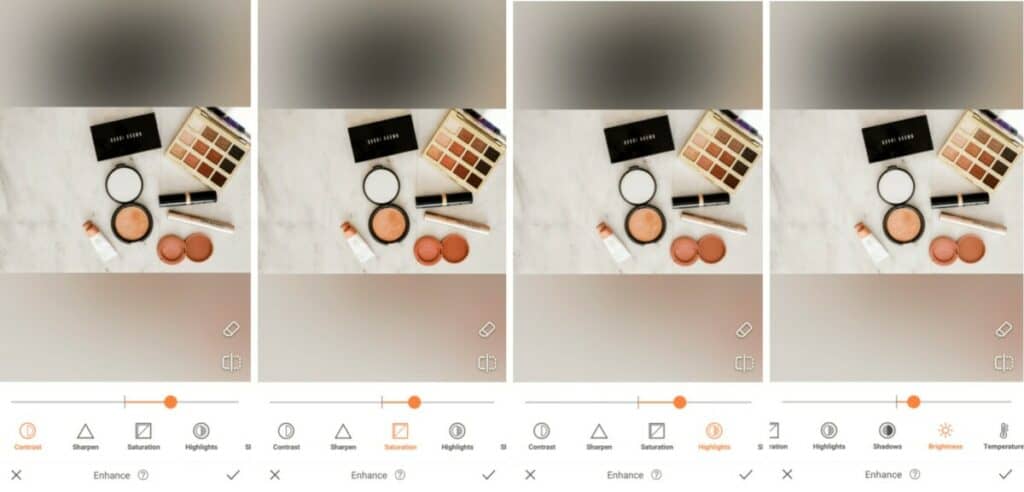
Even with ideal lighting your flat lay may require some minor adjustments to make it look just right. Use the various features in our Enhance Tool kit to fine tune your photo.
- Select the Enhance tool
- Adjust the toggle on the Contrast tool to make the image more vivid
- Select Saturation to deepen the hues in the photo
- Use the Highlight tool to adjust the details on the lighter areas of the photo
- Use the Brightness tool to make the photo lighter in general
- Tap on the checkmark to save your edit
Cut out the Excess with Crop
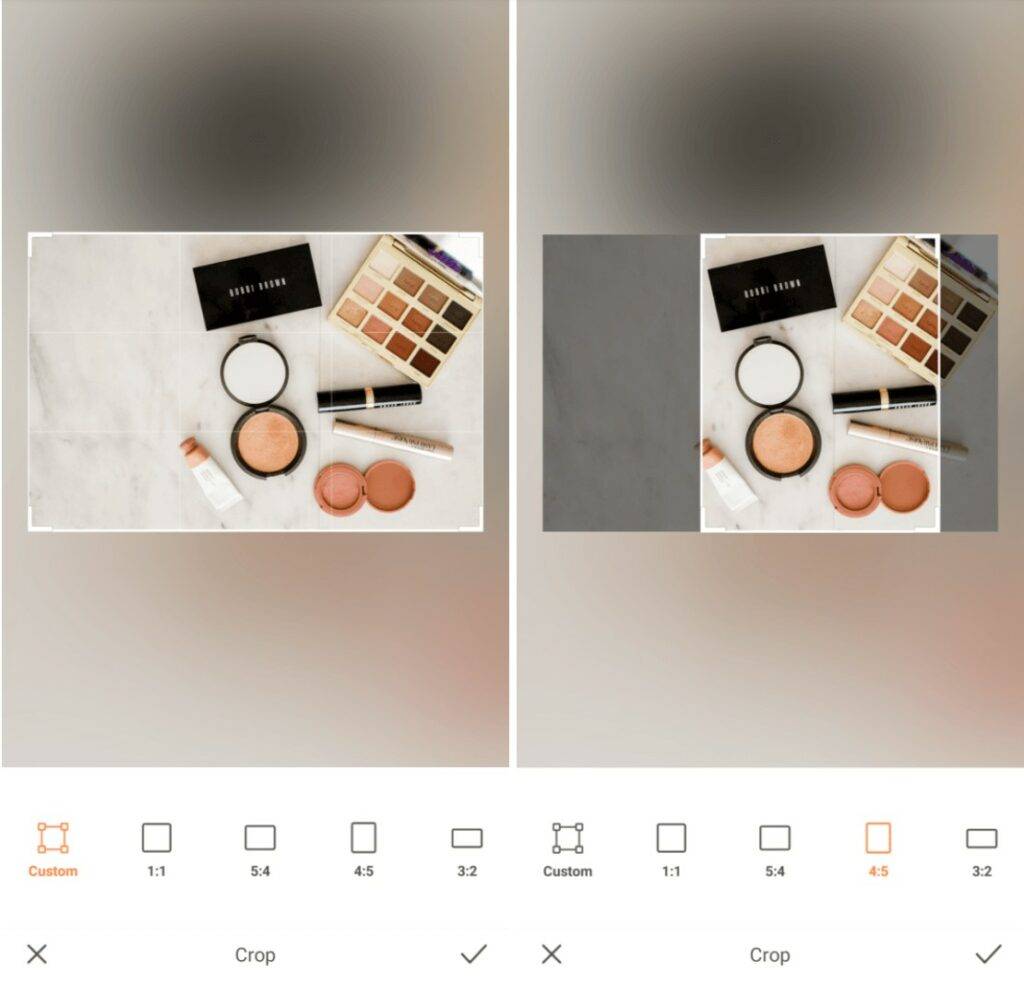
When shooting, it’s good to get as much into your frame as you can. However, oftentimes, the final product turns out to be a much tighter shot that truly reflects that story you’re trying to tell. To help with that, the Crop tool allows you to cut out the excess in your photo and frame only what you need to create an impactful flat lay.
- Go to Tools and select Crop
- Choose your preferred dimensions or opt to customize the size of your photo.
- Drag a corner to resize the frame
- Tap the checkmark to save your edit
Final Touch with a Filter
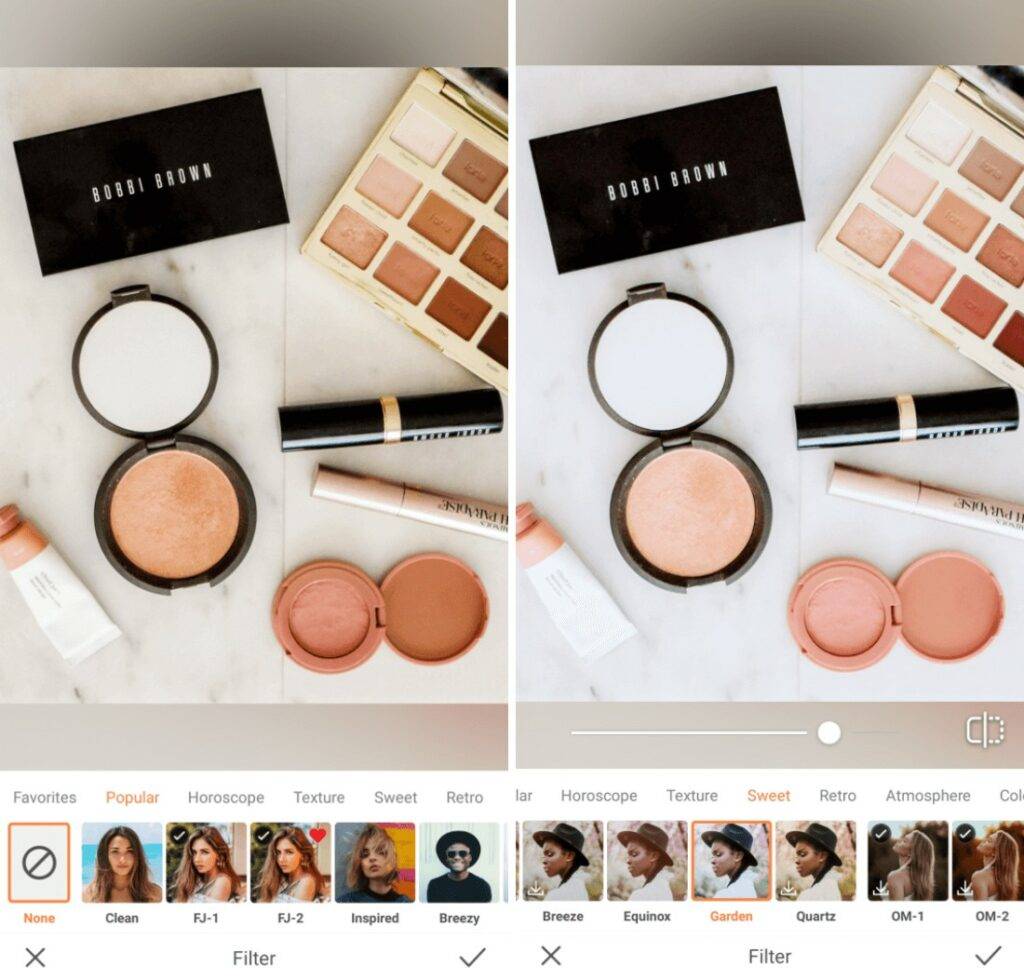
The ideal finishing touch on any flay lay edit is always the perfect filter. Because these photos are meant to showcase items, not distract from them, it’s always best to go with filters that are light and don’t have any added effects.
- Go to your Filter Library
- Select a light filter that works best with your photo
- Use the center toggle to adjust the strength of the Filter
- Tap on the checkmark to save your edit

And there you have it, a flat lay worth sharing courtesy AirBrush, the easy photo editor! Be sure to tag #AirBrushApp when you post it and follow us on Instagram @AirBrushOfficial for more cool photo editing tips!


