It’s your first AirBrush edit and we are soooo excited for you! Basically, your photos (and life overall) won’t ever be the same again. Because with all the cool features and tools at your disposal, you’re about to make real magic! To get you started on your editing journey with AirBrush, the easy photo editor, we’re going to walk you through a simple tutorial. Ready? Let’s go!
Step 1: Set the Tone with Enhance
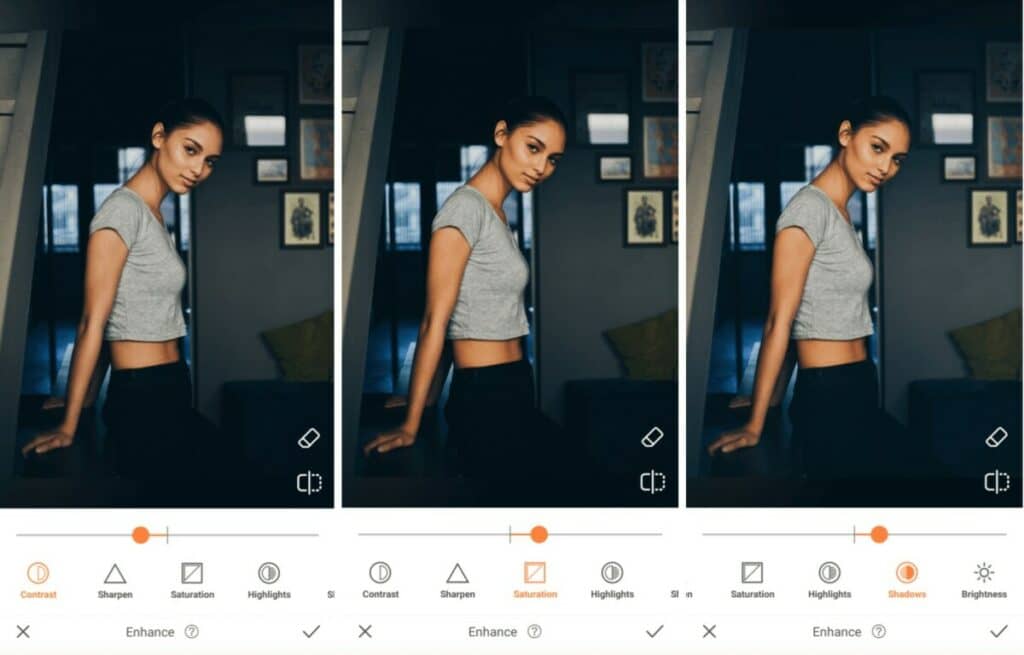
Let’s start with the basics, and when we say “basics” we mean the miracle-working Enhance tool. Usually, the first stop for many when creating an AirBrush edit, this feature is chocked full of detail-oriented features that allow you to transform photos in an instant. With Enhance you have the ability to make colors pop, introduce or remove light, and much more. So go forth and have fun experimenting with the various options available!
- Select the Enhance tool
- Adjust the toggle on the Contrast tool to make the image more or less vivid, depending on the light
- Select Saturation to deepen the hues in the photo
- Use the Shadow tool to adjust the details on the darker areas of the photo
- Tap on the checkmark to save your edit
Step 2: Get Glammed up with Makeup
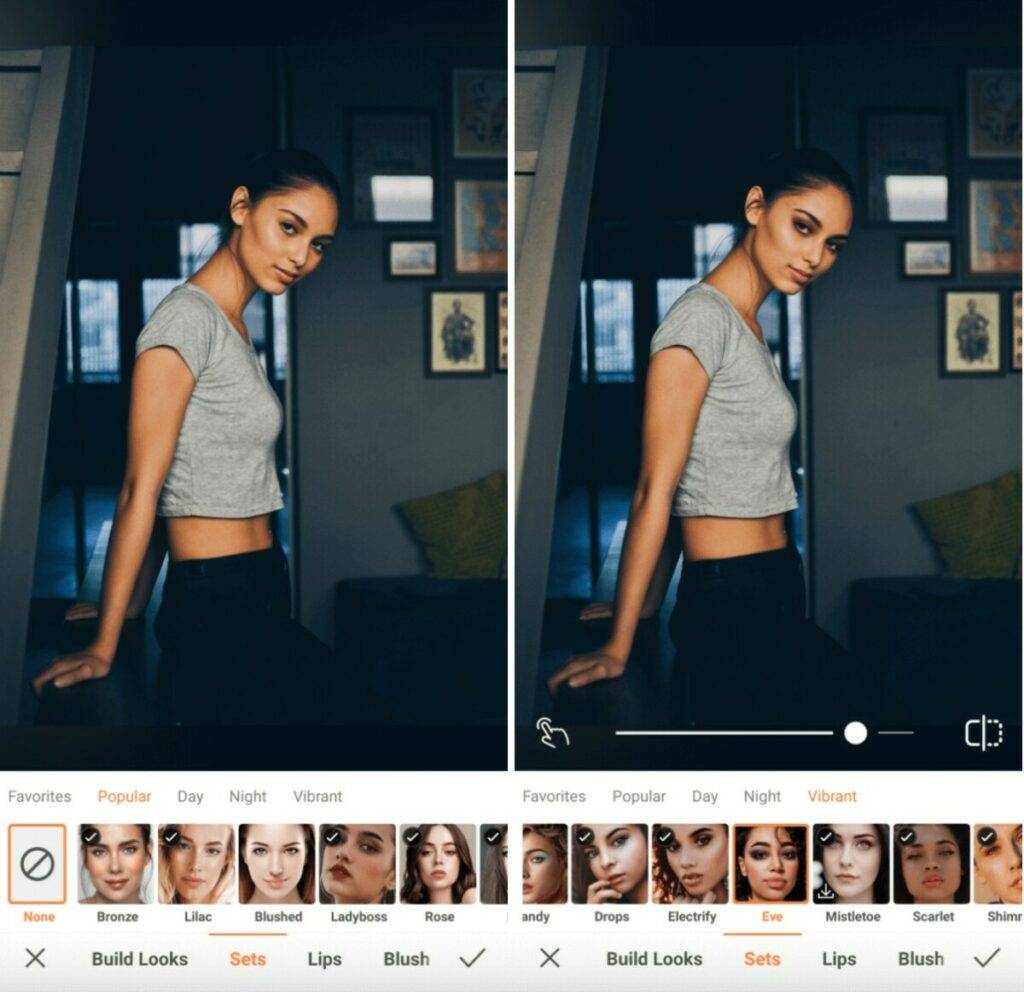
Looking for a quick touch-up? Not just for your photo, but for your face? Then our Makeup Presets are your best friends! Whether you’re looking for a beat that’s fierce or subtle, colorful or subdued, you’re bound to find a makeup set that matches your vibe. Feel free to scroll through our extensive collection before selecting the one that works best for your AirBrush edit.
- Go to the Makeup Tab
- Choose the Makeup Filter you like best
- Adjust the strength of the filter using the center toggle
- Tap the checkmark to save your edit
Step 3: Give it a Professional Touch with Bokeh
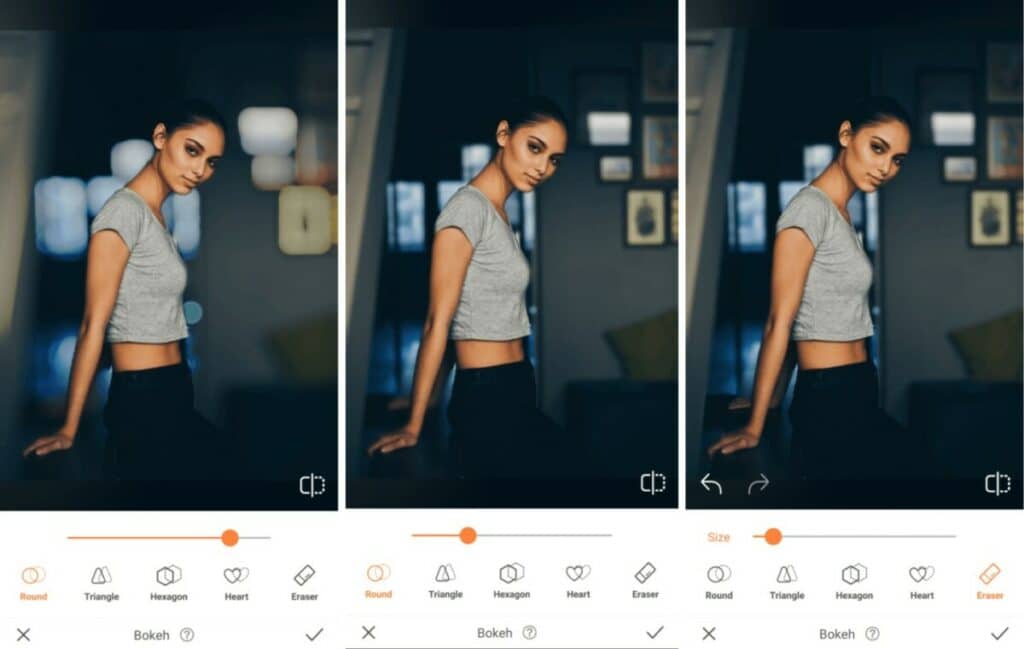
Not a professional photographer but want to create edits like one? The Bokeh Tool is your secret weapon! With just one tap of your finger, you can blur the background of your photo, ensuring the main subject is the only thing in focus. And, if that wasn’t cool enough, the Bokeh effect comes in different options, ranging from round to hexagonal to heart-shaped so you can truly make your AirBrush edit stand out!
- Go to the Bokeh Tool in the toolbar
- Bokeh will automatically detect the areas to keep focused
- Adjust the degree of the Bokeh effect by using the center toggle
- If there are any blurred areas that you would like to keep in focus, use the Eraser to remove the effect
- Tap the checkmark to save your edit
Step 4: Find Your Perfect Filter
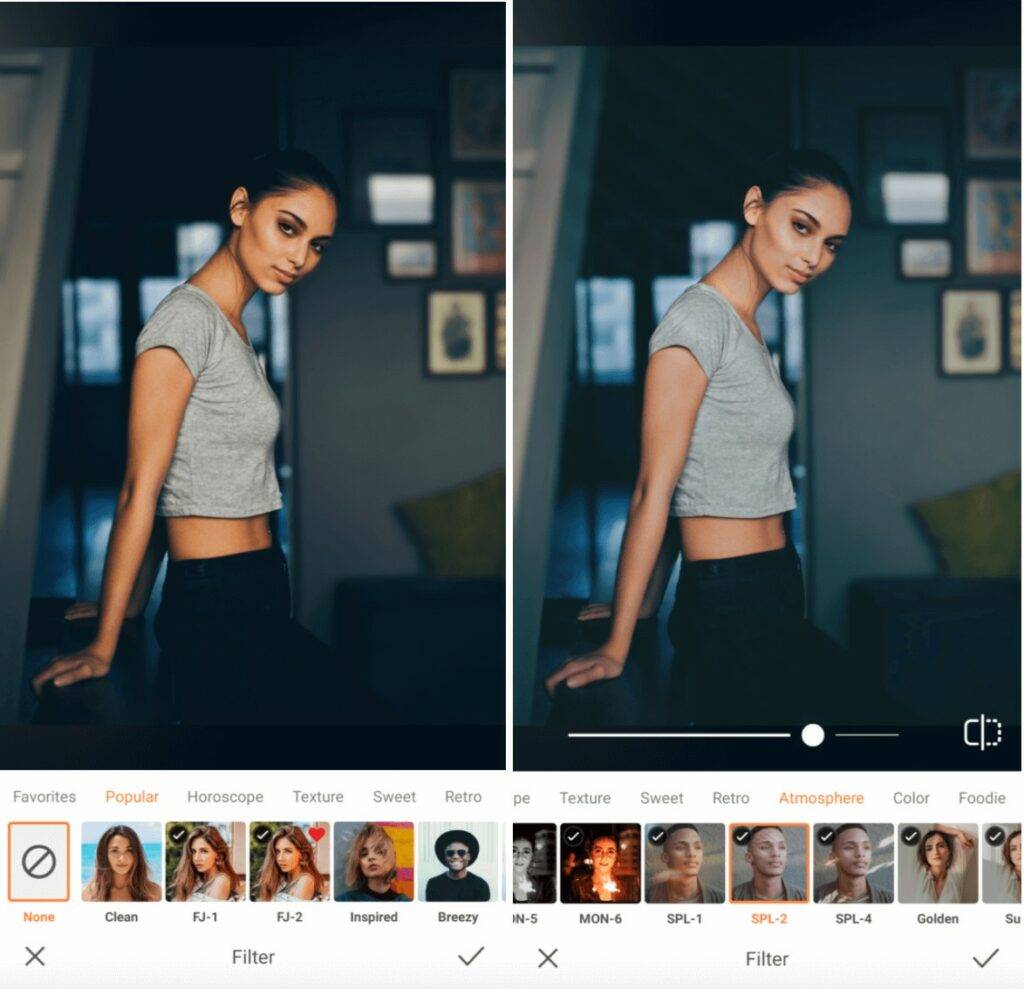
And finally, the piece de resistance on any AirBrush edit: the Filter. Our Filter Library has over 200 filters in categories ranging from Horoscope to Retro, to Foodie. Find the one that works best with the mood you’re trying to create and apply it to your photo for a flawless finish.
- Go to the Filter Library
- Scroll through to the various categories and select your favorite
- Use the center toggle to adjust the strength of the Filter
- Tap on the checkmark to save your edit
Indeed, the possibilities are endless with AirBrush, the easy photo editor, and now you’re ready to create your first AirBrush edit! Share the end result with us using #AirBrushApp and be sure to follow us on Instagram at @AirBrushOfficial for more editing tips, hacks, and tricks!


